


Are you ready to give your furry friend more freedom?
Installing a cat flap in a house wall can seem intimidating at first, especially when it comes to your cat's safety and comfort.
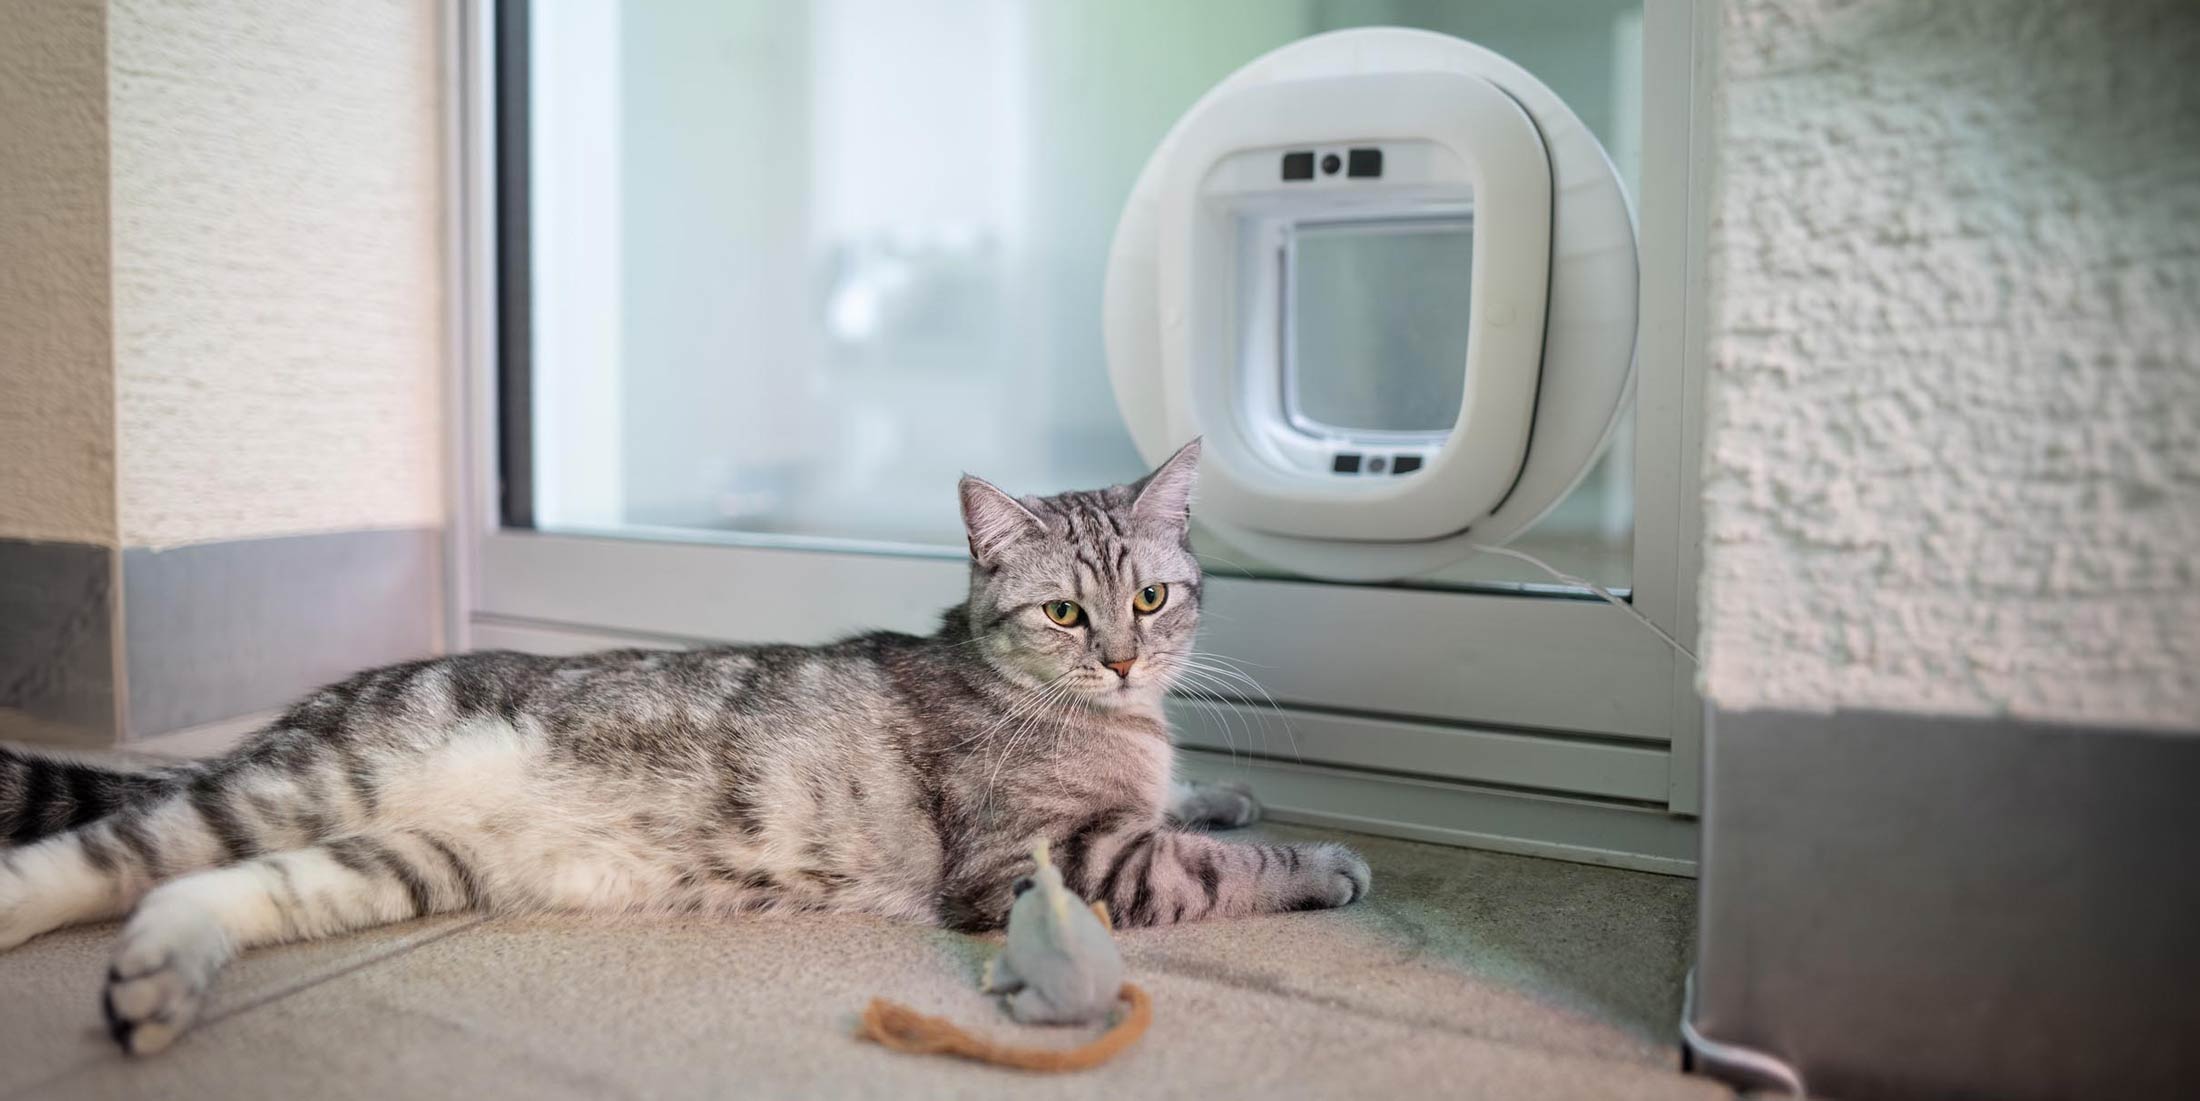
The optimal position for a cat flap is a protected area that offers enough space and is easily accessible for your cat, with the height adjusted to your cat's belly.
In this article, we'll walk you through the process of installing a cat flap in your home, from choosing the right flap to important safety considerations and final maintenance.
Choosing the right cat flap: What to consider
Choosing the right cat flap is crucial to ensuring your cat can enter and exit comfortably and safely. There are different types of cat flaps that are specifically designed to be installed in house walls. These are usually better insulated and more resistant to the elements, making them ideal for outdoor use. Make sure you choose a flap that is large enough for your cat and is easy to operate.
When making your selection, you should also look for additional features such as microchip detection or 4-way locks, which can increase convenience and security. Microchip cat flaps recognize your cat's implanted microchip and only let them in and out. This prevents strange animals from entering your home. Consider which features are best suited to your situation and how they might affect your cat's daily life.
The material of the frame also plays an important role in choosing the right cat flap. Frames made of aluminum are not only durable and weatherproof, but also provide good insulation. Make sure the flap has a good locking system to avoid drafts and maintain the energy efficiency of your home. A well-chosen cat flap can therefore contribute to energy efficiency while ensuring your cat's comfort.
Materials and tools required for installation

To install a cat flap, you will need various tools and materials to ensure a safe and permanent installation. First, you will need a drill with appropriate drill bits for the material of your house wall, be it wood, metal or masonry. You will also need a jigsaw or a metal saw to precisely cut out the opening for the cat flap.
In addition to the tools, certain materials are also required to complete the installation. These include sturdy screws and wall plugs that match the material of your wall, as well as sealing material or silicone to make the cat flap weatherproof and protect it from the elements. A template, which is often included with the cat flap, helps you to mark the cut-out size precisely and makes installation easier.
Step-by-step instructions for installing a cat flap
Before you start installing a cat flap in the wall, it is important to have all the necessary tools and materials ready. These include a pen, a tape measure, a saw or drill and the cat flap kit. You should also have fine sandpaper and sealing material ready to seal the flap later and make it draught-free.
The next step is to mark the position of the cat flap on the wall. Measure the height of your cat's belly from the floor and transfer this to the wall. Draw the outline of the flap on the wall according to the manufacturer's instructions. Make sure the opening is large enough and in a place that your cat can easily reach.
Now comes the part where you open the wall. First, drill a hole in each corner of the marked area. Then carefully saw or cut along the lines to create the opening for the cat flap. You should:
- Wear safety equipment such as gloves and safety glasses
- Work slowly and precisely to avoid damaging the wall
- Smooth the edges after the opening has been sawed
Finally, insert the cat flap into the opening and fasten it according to the instructions. Make sure that the flap is firmly and securely in place. Use the sandpaper to smooth out any sharp edges and seal the flap with sealing material to prevent drafts and water. Your cat can now use its new door and you can enjoy energy-efficient and comfortable access for your four-legged friend.
Safety considerations when installing a cat flap
One of the most important security considerations when installing a cat flap is burglar resistance. A non-burglar-proof cat flap can be a welcome opportunity for burglars to break into your home. That's why it's important that you pay attention to certain security aspects when choosing and installing a cat flap.
To minimize security risks, choose a cat flap with robust materials and mechanisms that only allow access to your cat. Install the flap at a sufficient distance from door and window handles and consider using additional mechanical security, such as latches or locks that are not accessible from the outside. A burglar-proof cat flap not only protects against unwanted guests, but also gives you peace of mind when you are not at home.
Optimize the weather resistance and insulation of the cat flap
To make your cat flap weatherproof and ensure good insulation, start by checking the seals. These should be intact and have no cracks or holes that could let cold air in. If necessary, replace them or add additional sealing strips.
Another measure is to attach insulating material to the inside of the flap. For example, foam boards that you can cut to size and attach to the flap are suitable for this. Also make sure that the cat flap has an overhang or a sluice that prevents precipitation from getting in. Magnetic strips on the bottom edge of the flap can help to close it tightly and thus protect it from the wind.
Care and maintenance of the built-in cat flap
Regular care and maintenance of your cat flap is crucial to prolong its life and ensure it works properly. Clean the flap regularly with a damp cloth to remove dirt and dust and check the flap's mobility.
Also check the batteries or power connection if your flap is electronic and replace them if necessary. If necessary, adjust or replace worn parts to ensure your cat can always go in and out without any problems. By following these simple steps, you can ensure the functionality and safety of your cat flap.
Legal information on installing a cat flap
When installing a cat flap in a rented property or passive house, you need to consider a number of legal aspects. In rented properties, it is especially important to obtain the landlord's consent before you begin installation. This is because a cat flap can be considered a structural change that could affect the appearance of the property or its safety. Without the landlord's consent, you could face legal problems or even eviction.
In passive houses, the requirements for energy consumption and insulation are particularly high. Installing a cat flap could affect the energy efficiency of the house, so it is important to choose a flap that is specifically designed to meet high insulation standards and minimise energy loss. In both cases, it is advisable to seek legal advice before installation to ensure that all regulations and requirements are met.
Cost overview: cat flap and installation
The cost of a cat flap and its installation can vary depending on the model and type of installation. For a simple manual cat flap in a wooden door, the cost can range from €140 to €570, including installation by a professional. If you opt for a technologically advanced microchip-controlled cat flap installed in a glass door or window, the cost can range from €116 to €540.
If you are handy and want to do the installation yourself, you can save money, but there is a higher risk of making mistakes that can lead to heat loss or safety issues. The cost of the material alone is around £40 to £170, depending on the type of cat flap. However, it is important to note that having a professional install it provides extra peace of mind and ensures that the cat flap is installed correctly and safely.
Discover the benefits of the Flappie smart cat flap
The intelligent cat flap from Flappie offers you and your cat decisive advantages. With selective access control and prey detection by AI-supported cameras, your home remains free of unwanted prey such as mice and birds. These technologies not only ensure cleanliness, but also security in your home.
With the Flappie app, you can control the cat flap remotely and receive real-time notifications about your cat's activities. Discover the benefits on the Flappie website and experience how this innovative solution makes everyday life easier for you and your cat. Visit https://flappie.ch now and get the latest technology for a prey-free home.
Frequently Asked Questions
Can a cat flap be installed in a wall?
Yes, a cat flap can be installed in a wall. The article describes detailed instructions on how to install a cat flap safely and effectively in a house wall, including choosing the right cat flap and the necessary tools and materials.
Is a cat flap a structural change?
Yes, a cat flap can be considered a structural alteration, especially in rented accommodation. It is important to get the landlord's consent before starting the installation to avoid legal problems or possible eviction.
Can you install a cat flap in a wall?
Yes, a cat flap can be installed in a wall. The article describes detailed instructions on how to install a cat flap safely and effectively in a house wall, including choosing the right cat flap and the necessary tools and materials.
Share:
Problems with the cat flap? Magnet set too strong?
Cat flap for strange cats: preventing entry